Revised May 30, 2025
A glissando is a slide between two notes. On the harp, a glissando is executed by sliding the finger from the starting note to the ending note. Depending on the type of glissando, different notational components may be required. In this article, we will discuss how to notate a harp glissando with each of these components and when to use (or not use) them.
Prefer to learn via video? Scroll down to watch.
Glissando Line
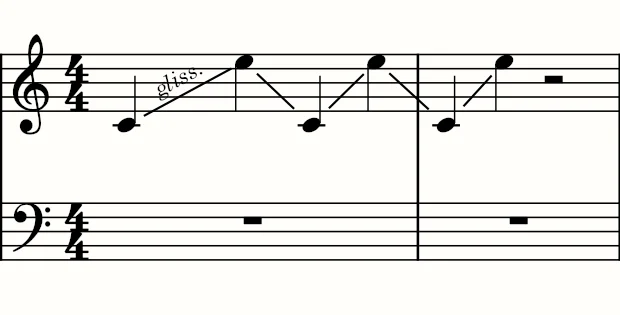
A glissando can be notated with either a wavy line or a straight line accompanied by the “gliss” abbreviation. Most notation programs offer both options. Although the wavy line is preferred, either notation is acceptable. However, using a straight line without the "gliss" indication is not recommended.
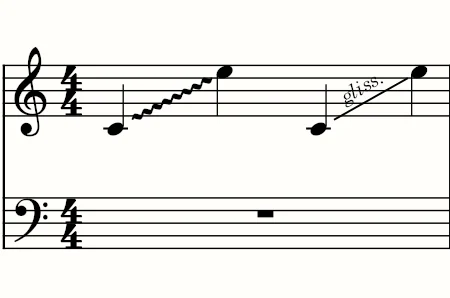
Note: If the range is short, the “gliss” abbreviation may not appear. To address this, you may need to increase the distance between the notes so that the abbreviation is visible. If you have a series of glissandi (as shown below), the “gliss” abbreviation only needs to appear on the first glissando line.
Start and End Pitch
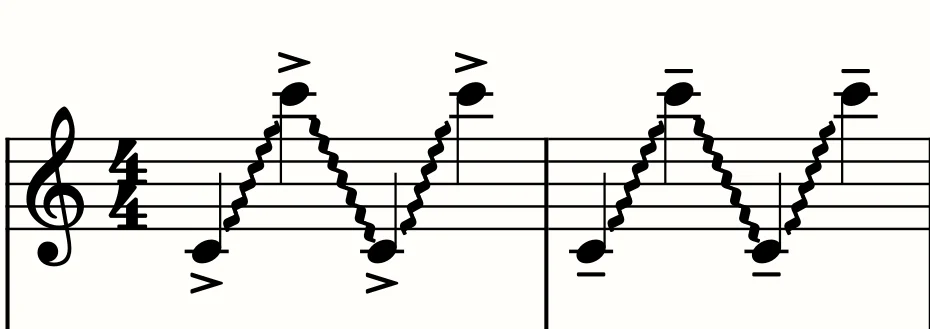
Depending on the context, you may wish to articulate a specific pitch at the start or end of the glissando. Generally, it is more common for the harpist to articulate the end of a glissando rather than the beginning. Additionally, harpists may not always articulate the bottom and top pitches of turnaround glissandi (as shown in the example above).
You can use regular noteheads for the glissandi regardless. Alternate options include (1) accents or tenuto marks for articulated pitches, (2) parentheses and/or smaller noteheads for non-articulated pitches, or (3) omitting specific notes and using the glissando line to suggest the general range. If you choose this third option, it may be helpful to indicate the rhythm with noteheads above or in the middle of the staff, unless you prefer a non-rhythmic glissando.

Beginning Noteheads and Pedal Charts
Generally, glissandi without pitch indications will be played using whatever chromatic/pedal combination is available at the time. If you want specific pitches (especially if these pitches do not align with the key signature), you should include (1) a pedal chart and (2) the first seven notes of the glissando. If you have a set of glissandi using the same pitches, you only need to do this for the first glissando line. It is important to include both of these items. The pedal chart interprets the written pitches (i.e., the written-out seven notes) rather than dictates them.
Note: The pedal chart can be placed in the middle or above the staff.
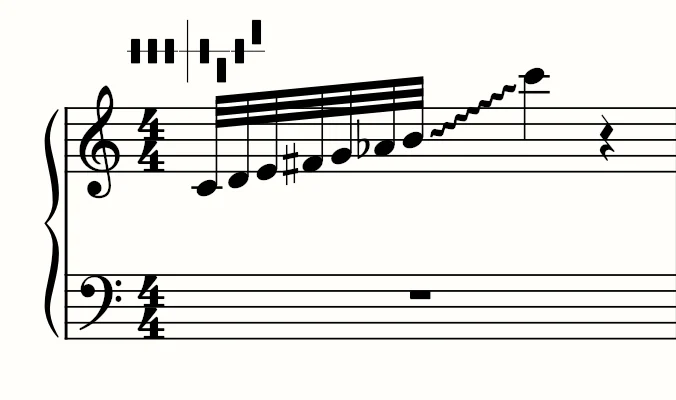
To generate these pitches, you can manually write them out using 32nd notes and then connect them to the final note with the glissando line. You can also use smaller noteheads for these seven notes to achieve a cleaner look.
Note: You may need to manually space out the final note so that the glissando does not appear cluttered.
If you use Sibelius, you can download the Harp Gliss and Octave Notes plugin to generate these pitches automatically.
Other Notation Considerations
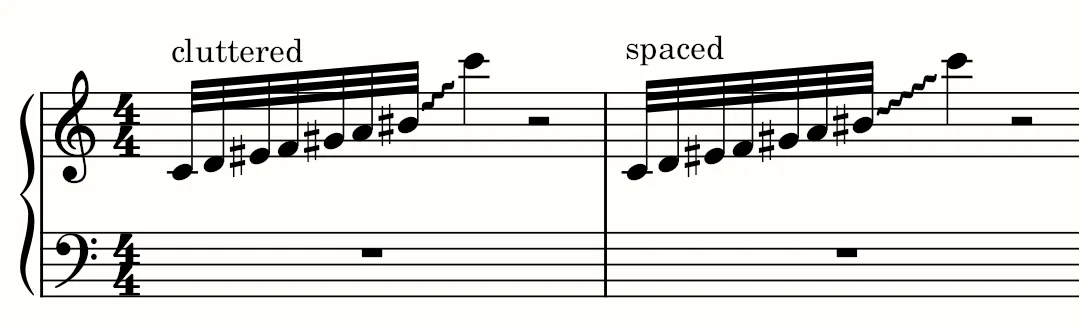
Spacing
Generally, you may need to adjust the note spacing in a glissando for visual continuity. Without any spacing adjustment, the glissando line can appear too tight. If you make this adjustment in a full score, you will need to double-check the glissandi once the score is finished, as the spacing may have changed.
Note: in the original version of this article, the examples created in Sibelius allowed for an extra cluttered example. The new example, generated in Musescore, only allowed mild cluttering. In this case, the "cluttered" example may still be passable, even though the "spaced" example is preferred.
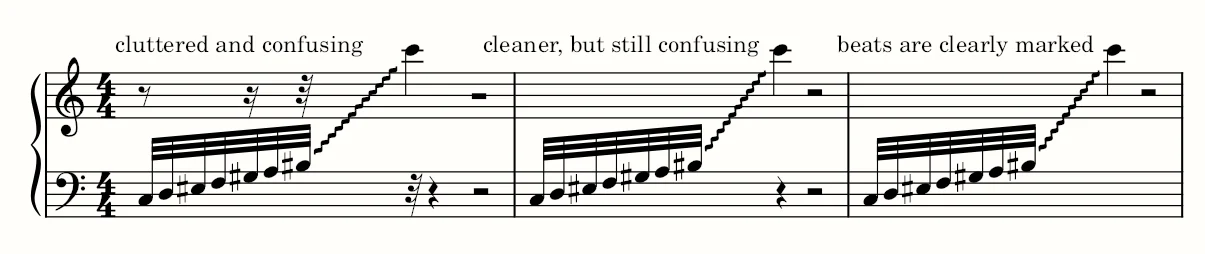
Rests
For cross-staff glissandi, you may encounter extra rests. While not all of these rests may be necessary, it is important to ensure that the rhythm is clear. In the first example, all the default rests are left in, which is confusing. In the second example, both staves have rests. This example is clearer, but since the glissando implies a single voice between the staves, the extra rests are not necessary. In the third example, only the necessary rests are included.
Pedal Notation and Scores
For orchestral harp parts, the pedal charts need only appear in the harp part, not in the full score. In smaller chamber music ensembles (2-5 parts), some harpists prefer to play from scores. In such cases, you can include the pedal charts in both the full score and the individual parts.
Glissando Checklist:
- Use the wavy line or straight line with the “gliss” abbreviation. If you use the straight line, is the “gliss” abbreviation visible on the first glissando?
- Do you want specific start/end notes? If so, consider using accents or tenuto. If not, consider using smaller noteheads with or without parentheses.
- Do you want the gliss notes to use the existing accidentals? If not, write out the first seven notes. You can also include a pedal chart in addition to the written-out notes.
- Do you want the gliss notes to use the existing accidentals? If not, write out the first seven notes. You can also include a pedal chart in addition to the written-out notes.
- Is the glissando spaced clearly?
- Final check: Once the score is finished, take one more look over all of the glissandi. Are the glissando lines still attached to the notes? Do you need to respace any of the notes? Are the pedal charts (if applicable) still positioned correctly?
Thank you so much, Danielle! You’re providing clear, consistent guidelines for composers, and setting harpists up for well-written, readable scores. Bravo!
Thank you. Excellent exposition. FGB
Thank you so much